Update failure could happen due to several issues. The issue could occur due to corrupted softwareDistribution folder or hidden temporary folder “$Windows.~BT “ which holds all downloaded for Windows 10 upgrade. Sometimes the update may even fail due to an issue with the video card drivers. Here in this article, we will see all the methods that might help you solve your issues with the Windows 10 upgrade.
Method 1: Delete or Rename “$Windows.~BT” folder
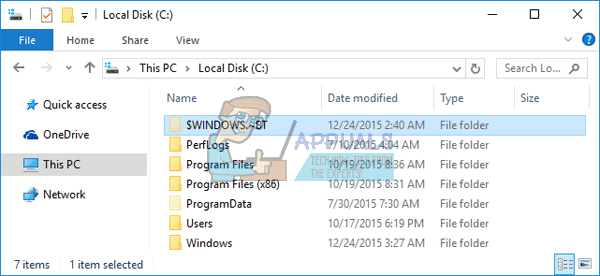
Sometimes just renaming and deleting the folder “$Windows.~BT” can do the trick. “$Windows.~BT” is the hidden folder in Windows system drive which saves all the downloaded files which are required for Windows 10 upgrade. You can follow the steps given below to delete or rename this folder. Hold the Windows Key and Press E to open File Explorer. Double click on the System Drive to open it. Mostly C: is the system drive, however, in case you have a different drive letter, make sure to open the correct drive. In File Explorer, Press “alt” key to show hidden Menu. Click on Tools -> Folder Options. In the Folder Options Window, Click on View tab. Click on “Show hidden files, folders and drives” option. Click on Apply and OK. Now you should be able to see hidden files on the system drive Look for “$Windows.~BT” folder.
Delete the folder. If deleting is not allowed, rename the folder. Reboot the system and try running the update.
Method 2: Rename SoftwareDistribution Folder
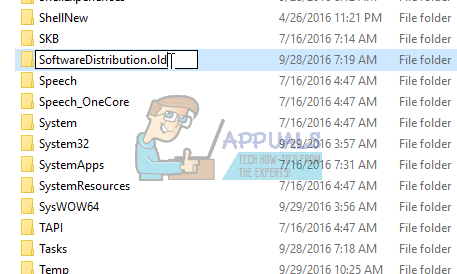
Sometimes the corrupted SoftwareDistribution folder can cause issues running the update. Renaming this folder can help us fixing this issue and update can be run successfully. The Software Distribution Folder is the folder in Windows operating system which is used to temporarily store the files required to install Windows Update. This folder is located in the Windows directory of the system drive. To rename, this folder, follow the steps given below. Hold the Windows Key and Press R. Type services.msc and hit Enter. This will open Services Window Right click on “Windows Update” service and click on Stop Hold the Windows Key and Press E to open File Explorer. File Explorer will open. Double click on the system drive(C 🙂 to open it. In Case you have system drive named with a different letter, open that. Double click on Windows folder to open it. Right click on SoftwareDistribution folder and click Rename. Rename the folder to SoftwareDistribution.old.
Close File Explorer Go to Services window again. Right click on “Windows Update” service and click on Start Now try running the update again.
Method 3: Removing Display Adapter drivers.
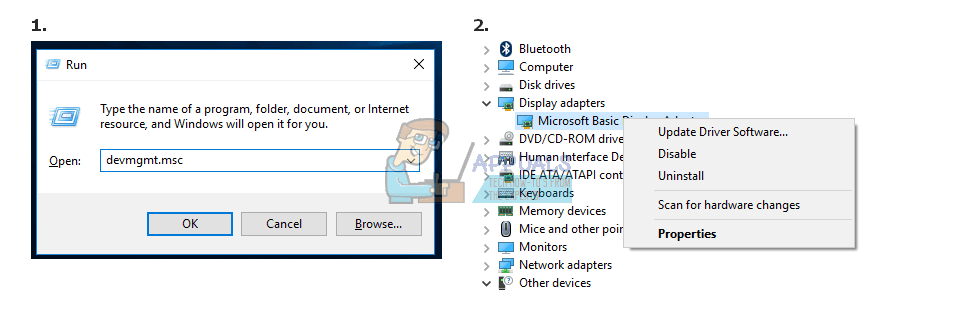
One of the users has reported that completely removing the display card drivers helped him fix the issue with this update error. He had NVIDIA GeForce Display Adapter. The Windows update was failing as it was trying to install the same driver that was already there on the system. In case this is the situation with you, you can try below steps to completely remove Adapter driver. Hold the Windows Key and Press R. Type devmgmt.msc and Click OK. Type devmgmt.msc and hit Enter. This will open Device Manager Locate NVDIA GeForce Display Adapter. Right click on the adapter and click on Uninstall. (Choose to completely remove the existing driver)
Right-click on your computer name at the top, in device Manager. Click on “Scan for hardware changes”. This will install generic drivers for the adapter Reboot the system. This will discover NVDIA GeForce display adapter and install the proper driver Now run Windows update. This should work now.
Fix: Windows Update Error “We Couldn’t Connect to the Update Service”[SOLVED] One of the Update Services is not Running Properly in Windows UpdateLast Free Update For Windows 7 Released, KB4534310 And KB45343140 Are The Final…How to Update the Windows Update Agent to the Latest Version


