On the other hand, Solid State Drive’s (SSDs) have become extremely popular due to their speed, reliability and faster read/write speed, more and more people are switching from their Victorian HDD’s to this era’s SSDs and at the same time, where data is of critical importance many of us would like to back them all up on an external hard disk, and put it in a safe place. Whether it is migration from HDD to SSD, HDD to another HDD or a back up of your HDD, cloning is my preferred method because it eliminates the need to re-install programs and simply replacing it will bring about the same results as if nothing has ever happened. When you clone a disk, you create exact copy of it, this means that whatever is there on the disk now, will be there on the cloned drive so there will be no need to re-install anything, just plug n play. “Cloning is copying the source drive exactly as it is, including the device drivers, hidden folders, OS files and settings you saved, to the newer disk drive”. You can think of it as a perfect and identical copy of the existing one. Once cloning is complete, all you need to do is replace it. In order to get started, you will need to make sure that you have access to your source drive, the new drive clone will be made of. There are numerous tools out there, but for the sake of this guide, we will be using a free one that has never given up on me and it’s called Macrium Reflect. You can get it from here Another point to note is that your destination disk should be atleast 30% larger then the source. If your C:\ was 250 GB then you should not attempt to make a clone of it on anything less then 325GB.
Install Macrium Reflect
After you’ve downloaded Macrium Reflect, run the setup file and select the Free/Trial Software option if you downloaded a free version of the Macrium Reflect. If you have the license key, you can enter that below the first option. Select the download location where you want to place all additional files required to run the software. Click on the Download button at the bottom to initialize the download for additional files required. After the additional files are downloaded, you can install the software by following the prompts on screen.
Create Rescue Media
After you launch the Reflect – You may be prompted with a dialog to create the rescue media.
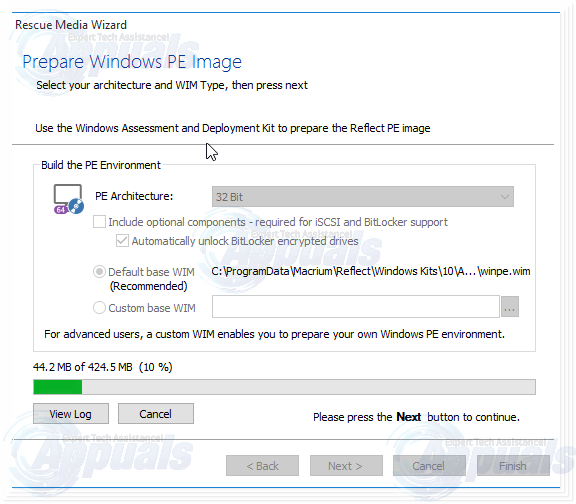
You now need to create the rescue media in order to recover from any unexpected and unforseen errors that may come up during the process. Connect your rescue media to your PC (a writeable dvd or a USB). Either click YES when it asks if you want to create the rescue media OR open the Macrium Reflect tool and navigate through the top menu to Other Tasks > Create Rescue Media. Click Next multiple times. Stick with Default settings and at the end, select the relevant recovery media based on the type of media you are using for recovery (USB or DVD). You will then be provided with the rescue media wizard, continue with the instructions on screen and if it tells you that it is going to download 400mb files from Microsoft, proceed with it and click YES. Wait for it to finish the Download and follow on-screen instructions to create the rescue media.
Clone the Disk
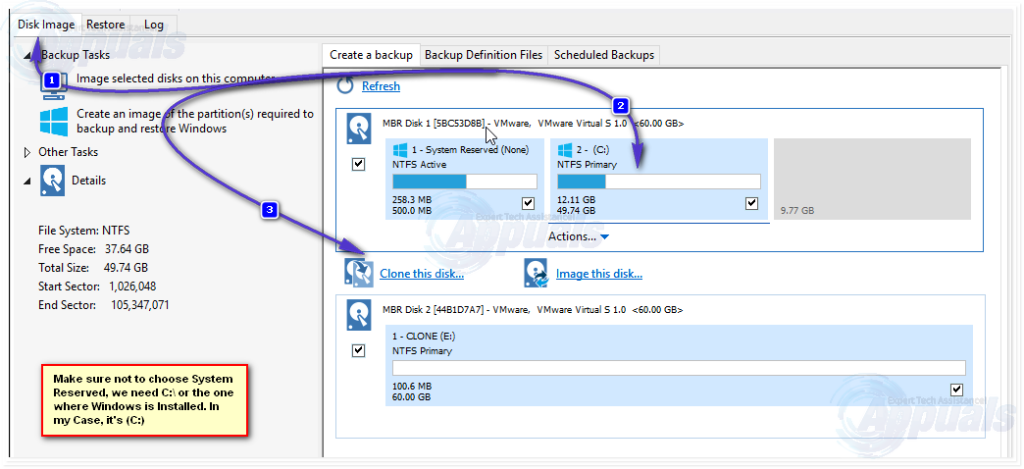
We now have the rescue media ready, we can continue with cloning the disk. Assuming that we now have the new disk (SSD or HDD) connected via connector or internally. We will now begin the cloning process – Inside the dashboard of Macrium Reflect, click on Disk Image from the left and select the drive where your Windows is installed. Normally, it would be C:\ drive but you can also see a Windows icon on that drive. While the Windows drive is selected, click on Clone this disk option at the bottom right.
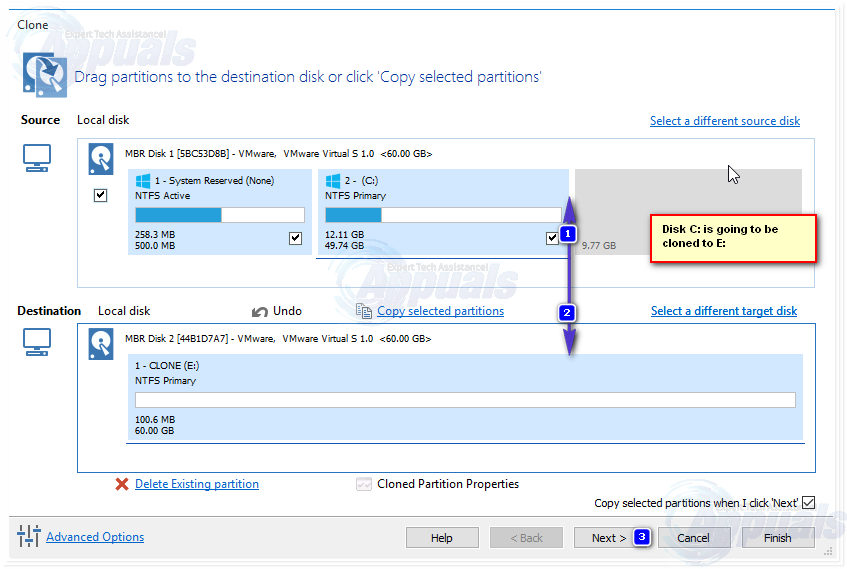
On the next window, select the destination disk drive where you want to clone your existing disk. Click on Select a disk to clone to and select the destination drive and hit Next. After selecting the destination disk drive, from the Advanced Options on the bottom left, make sure to select the Perform Intelligent Sector Copy. Click OK – Before going ahead with the cloning process, you will be given the Summary. If presented with a WARNING that the drive will be overwritten, click Continue.
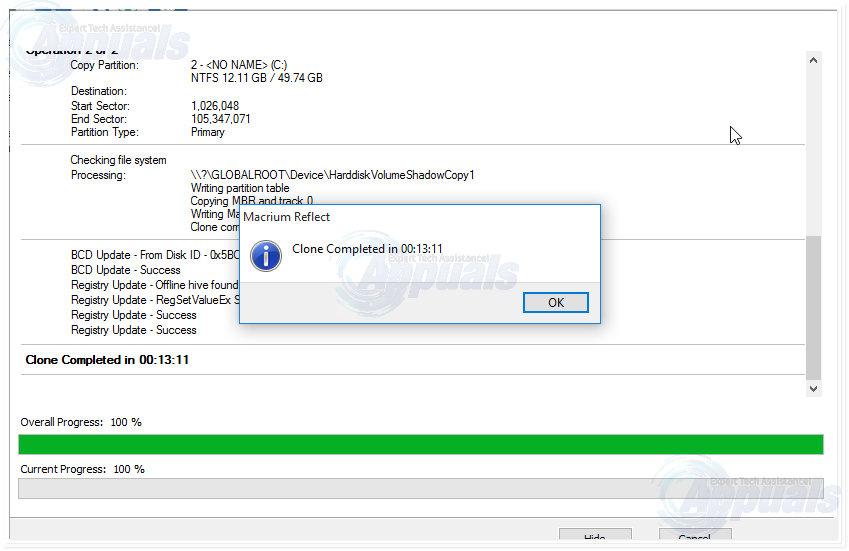
There is no margin for errors here, if the wrong drive is selected your entire DATA WILL BE LOST. If it all goes well, you will have a cloned copy of your existing hard drive in just a few minutes.
Once this is done, you’re set. If something goes wrong when you boot from your new hard disk, you will need to use the recovery media you created to resolve errors. It is common for errors to come up because some features are tied to hardware and use their IDs to perform / execute tasks. This is where the Rescue Media will come handy. All you have to do is to boot your PC using the recovery media and Macrium Reflect Tool will be launched automatically. From there, you can click on Fix Windows Boot Problems to fix all the boot related issues automatically. Before booting, you will need to change boot order to make your clone disk the first drive from BIOS (boot order priority).
How to Fix ‘Macrium reflect clone failed’ ErrorHow to Recover Soft Bricked Mediatek Clone PhonesHow to Correctly Use the Clone Stamp in Adobe PhotoshopLeBest X14 Pro Max is the Latest iPhone Clone You Don’t Need to Hear About